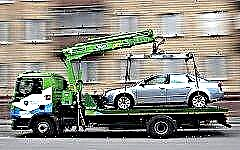
Replacing the timing belt on Priora 16 valves is a little more difficult than on 8-valve engines, however, this procedure is available to almost every motorist. Replacing the timing belt on Priora 16 valves is slightly more difficult than on 8-valve engines, however, this procedure is available to almost every car enthusiast.

The content of the article:
- Reason for replacement
- Required tools
- Belt problems
- Replacement process on Priora
A belt in a car engine is one of the main parts for transmitting torque from one mechanism to another. But it's worth remembering that everything has a shelf life limit. We will point out the nuances of working and replacing the belt in the article below.
Why change the timing belt on the Prior
Why this belt is needed, most likely, there is no need to explain. In general, probably, there is no need to explain why to change it, however, there are inquisitive minds who need a lot of information just for general development. And by this, let's get started.

So, the belt drives the gas distribution mechanism, namely the camshaft. That, in turn, raises the valves, which move towards the piston at the moment of the exhaust stroke. But they get into the saddle on time, so nothing bad happens. If the timing phases are violated, and it is this violation that occurs when the belt breaks, it may happen that the camshaft stays in one position when, for example, the intake valve in the first cylinder is open.
The moment the piston goes up, it will simply bend the valve. Repair of a domestic car in this case will cost about 15 thousand rubles, while repairing the head of a foreign car will have to pay from 30 thousand of our wooden ones. Therefore, it is imperative to monitor the belt, or better just the mileage. The plant regulates a span of 70,000 kilometers for this node. There are fellows who drove more than a hundred, but the 127 motor bends the valve, even as oppression.
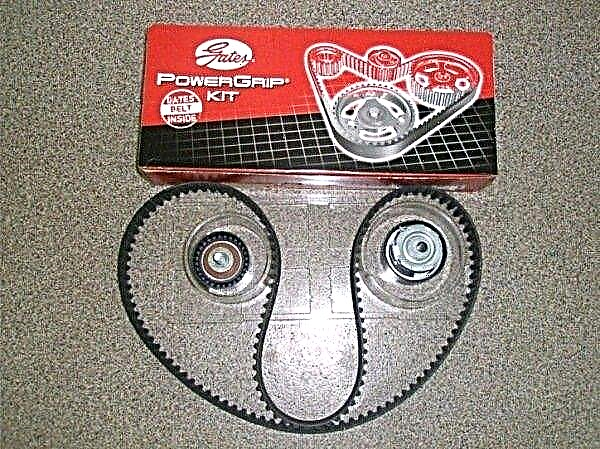
Tools for replacing timing for Lada Priora
To begin with, to replace the timing belt on the Prior 16 valves, you will have to stock up on a very specific set of tools. This is necessarily a set of hexagons, a set of torxes, and a set with a small 1/4 inch ratchet will not work, we'll tell you later why. In addition, you will need a device for tensioning the roller, only the usual one from 2114 will not work, you need a little wider. If you have enough strength, you can pull the video just by leaning against it with the editing tool, many do so.

It is also necessary to clarify, 16 valves on the Priora with or without air conditioning. If so, the belt needs a longer one. Officially supplied belt length 1125. However, most owners say that it is better to put 1115. This is due to the following. The fact is that initially the 16-valve 21127 was designed without an air conditioner. Everything was simple. The pump is driven by the timing belt, the alternator belt is no longer responsible for anything. In general, it couldn't be easier. Crankshaft and alternator with tensioner, no rollers.
The designers were faced with an almost unimaginable task - to install an air conditioning compressor, which they did. Yes, not perfect, but we did it. And therefore, two additional pulleys appeared here - a compressor and a tension roller. The problem is that before the contact patch of the alternator pulley was about 120 degrees. After the introduction of the new scheme, it is equal to about 30 degrees, because the tension roller pulls the belt, and does not press it against the pulleys, as it was, for example, on Kalina. By the way, many car owners later began to install these same brackets with a tensioner in order to dismantle this scheme.
Timing belt problems on Lada Priora
And now the main thing. Many have already guessed that the alternator pulley has a small diameter, and therefore the contact patch should be as large as possible. Here it is negligible, which, when water gets in, leads to slipping of the belt. This is especially noticeable when many consumers are turned on at the same time, when the load on the generator is maximum.
Replacing the timing belt for Lada Priore 16 valves
Let's get to work. To begin with, we unscrew the oil filler neck, then pull off the plastic casing. Further, there are two options for development. We'll look at the more sophisticated one with air conditioning. Its difference is in the additional video, this has already been said. The whole point is that it also needs to be unscrewed, because it simply interferes with removing the protective cover.
Here you need a head for 15. Unscrew the roller, remove the alternator belt. On the way, we listen to the video so that it does not buzz, otherwise - to replace it. Further, the timing belt cover opens in front of us. Remove the front top and bottom of the casing. To do this, unscrew the 8 torx bolts. This is also a surprise if you use a ratchet. One of the bolts, the one that is closest to the passenger compartment, will have to be unscrewed with a simple torx wrench, because the head with a tip and a ratchet will not fit between the engine and the side member. So, we removed the casing, in front of us is the timing belt and all the rollers.

It is advisable in advance to set the shafts in the desired position. The camshafts have marks inside, they should look at those marks that are on the plastic inner casing, that is, vertically up. It is best to rotate by the camshaft - it is easier than by the crankshaft. It is undesirable to rotate the camshafts separately from the crankshaft. A maximum of 10 degrees to correct the marks if they do not coincide by a tooth or two.
Then we turn the wheel all the way to the right, someone removes it, which is not necessary. We unscrew the 4 bolts securing the mudguard under the torx and one under the Phillips screwdriver to gain access to the crankshaft pulley. Here we need a long extension cord and a crank, as well as a head for 24. We put the assistant in the salon, he turns on the fifth gear and squeezes the brake pedal all the way. After that, unscrew the crankshaft pulley bolt. It's simple, it couldn't be easier.
After removing the crankshaft pulley, remove the thrust washer and see if the mark on the crankshaft gear coincides with the mark on the block. On the gear, this is a small notch left by the core, on the block, it is an ebb.

Now we take the key 15, unscrew the tension roller, while it is desirable to lock the camshafts from turning. They took off the video, looked at its condition, if it buzzes, be sure to replace it, it can jam.
After the marks coincided, they removed the roller, remove the old belt. It is advisable to remove the bypass roller to check its condition. Now we put the rollers in place, put a new belt. First we put it on the crankshaft, then on the pump, then on the camshafts.
Now all that remains is to load the roller. In order to hold it, you can use either a standard wrench, which is quite difficult to find on the market, or pliers for circlips. We tighten the rollers, and then assemble in the reverse order. Before assembling, turn the crankshaft two turns by hand. If it rotates, then everything is fine.
WHA